Category Archives: Fermentation

Bar Tartine Pepper Pastes

Bar Tartine’s book of techniques and recipes came out in December 2014. I had it on pre order and it was delivered on the day of release. This means that at time of writing some five months later, not enough time has passed to finish a large proportion of the recipes in the book which can take six months to a year!

But some are almost ready; fermented Brussels sprouts have another eight weeks in brine, and the first of my pepper pastes will be ready in about six. Although I’ve been cheating with the pepper pastes from the beginning, tasting them, cooking with them and seeing how their flavors develop over time.

For me the fermented pepper pastes are by far the most interesting technique in the book. There are four different recipes covering sweet, charred, sambal and chipotle pastes, and although the recipes are very different they follow the same basic steps:

– Break down peppers/chillies plus other ingredients to a purée
– Add salt
– Allow to ferment
– Partly dry/dehydrate
– Allow fermentation to continue at low temperature

Some recipes use peppers, some add chili, some add extra ingredients like onions and garlic. Some call for burning and/or smoking the peppers before puréeing. Regardless of the extras the basic technique is the same and once you’ve figured that out you can let your imagination go.

I’ve made several versions including smoked jalapeño (hot as hell) and smoked sweet pepper with tomatoes (smoky & very acidic from fermented fresh tomato), but the best batch so far was made with long red sweet peppers, onions and garlic. burnt over coals, then smoked. It mostly follows the charred pepper paste recipe from the book but also smokes the peppers as in the chipotle paste recipe.

I adjusted the salt to 2% of the weight of the puréed pepper mix rather than quantity given in the book; the original recipe calls for 45g salt per 2.6kg of raw ingredients (1.75%), but as everything gets charred & smoked the weight loss will vary from batch to batch so a post smoking % of salt is more consistent and allows for a variable batch size.

This recipe uses an offset smoker but you can adjust it for whichever smoker you have. You don’t specifically need a dehydrator, if your oven can be set to 43 degrees this will also work but you’ll need to double the drying time.

You will need:

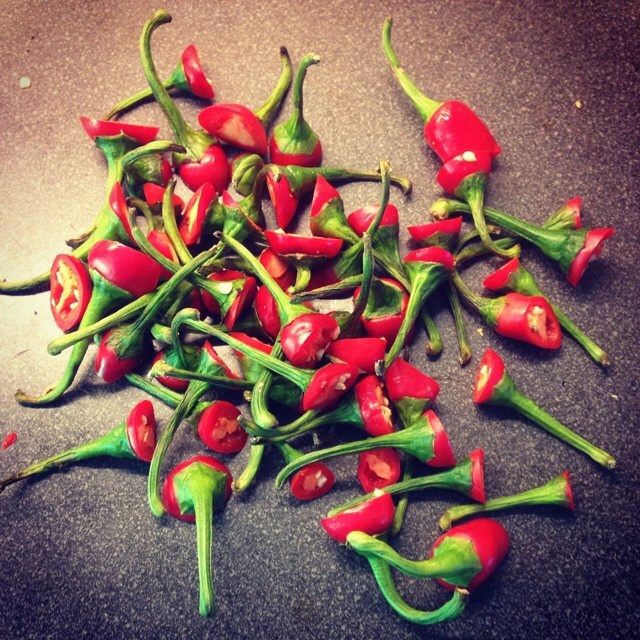
– a large amount of long sweet red peppers, halved and seeds removed
– 1 hot chili of your choice per 5 peppers, halved and seeds removed
– 1 red onion per 5 peppers, sliced into thick rounds
– 1 clove of garlic per 5 peppers, peeled.

Light a chimney of charcoal or briquettes and tip into your BBQ.

Arrange the peppers, chili and onion directly on the coals, turn occasionally until well charred. When nicely blackened move to the smoking chamber (or wherever you smoke in your BBQ) and repeat with the remaining peppers. When done close up the smoking chamber and add some wood/wood chips/etc to the coals (I prefer to use large pieces of wood as they smolder and smoke for longer). Smoke the peppers for 3 hours; in my offset smoker I use a metal pan of water as a heat diffuser to stop them burning.

The garlic needs to be cooked in some way. I found that peeled garlic cloves in the big smoker are impractical, so I use my stovetop smoker to hot smoke for twenty minutes. If you don’t have this option a ten minute simmer in milk will also work.

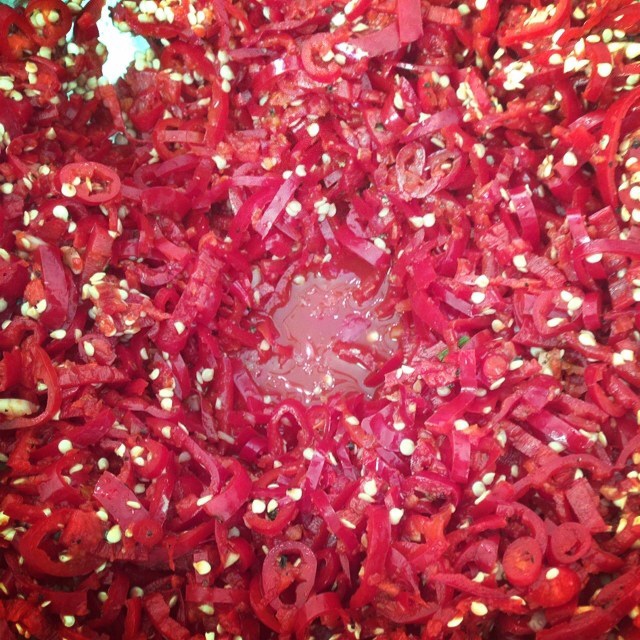
Once the peppers, chili, onion & garlic are smoked blitz them to a rough paste in a food processor. Weigh the resulting paste and stir in 2% by weight of salt (multiply total weight in grams by 0.02).

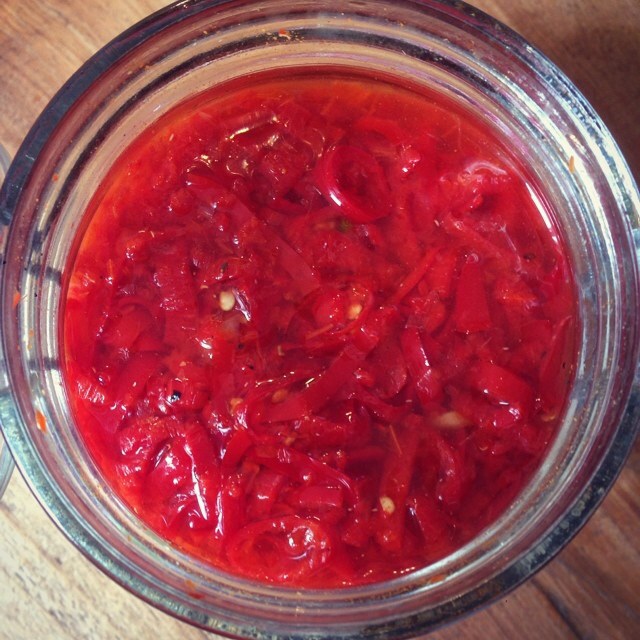
Move the paste to a large bowl, lay a clean sheet of cling film directly over the surface to stop mold growth and leave for ten days. Every day remove the plastic and stir the paste, smooth out and cover again with a clean piece of cling film. After two to three days the volume will increase as the paste starts to ferment.

Start to taste the paste around day eight, by day ten the paste should be slightly sour and more complex. When you’re happy with the acidity transfer the paste to a glass dish and dehydrate for 16 hours at 43 degrees until the paste is as thick as tomato purée from a tin. Transfer the paste to sealable jars and store in the fridge for six months to let the flavor develop & intensify.

Paste

Advertisement

Breakfast Muffins

This recipe uses a tiny amount of yeast over a long period of time to make light fluffy muffins with a thick chewy crust. I like to let them char a little on the outside for even more flavor, but I’m a baker and we tend to like burnt bread!

I call them breakfast muffins because if you follow this schedule they’ll be ready to eat at 9am on Sunday. If you can’t get stoneground wheat, all purpose flour is an ok substitute.

Poolish

This is a preferment that gives more flavor to the finished muffins. 

Stoneground wheat flour 100g | 100%
Water at room temp 100g | 100%
Dried yeast 2g | 2%

Saturday 12pm Mix the dried yeast through the flour then add the water and mix well. Scrape down the sides of the bowl, cover and leave for four hours.

Dough

Stoneground wheat flour 400g | 100%
Very hot water from the tap 125g | 31%
Cold milk 125g | 31%
Poolish 200g | 50%
Butter 20g | 5%
Salt 10g | 2% (2% of total flour in the recipe)
Sugar 25g | 5%

Note: there is no extra yeast added to the dough, the activity from the tiny amount in the poolish is enough to raise the dough.

Saturday 4pm Mix the hot water with the cold milk, combine with the rest of ingredients in a stand mixer or by hand. In a stand mixer mix for one minute on low speed and three minutes on fast (number 4 or 5 on a kitchen aid). If mixing by hand, combine the ingredients to a shaggy mass then kneed on a work top for 3 or 4 minutes until you have stretchy dough, return to the bowl and cover with plastic.

Saturday 4:45pm Using wet hands reach into the bowl and grab one side of the dough, gently stretch this up and fold it over on itself. Repeat this three or four times, rotating the bowl slightly each time. This stretch and fold action helps develop the dough, build gluten strength and equalise the dough temperature.

Saturday 5:15pm Repeat the stretch and fold action.

Saturday 6:00pm Repeat the stretch and fold; by this time the dough will be light and bubbly and very stretchy. Wrap the bowl well in plastic and store in the coolest part of the fridge. This does two things; it allows the dough to continue slowly fermenting and building more flavor, and it means the dough is ready to shape on Sunday morning.

Developed dough

Sunday 7:00am Yes it’s early but this will take ten minutes then you can go back to bed. Tip the dough onto the work surface and scale to 110g, you should get eight muffins from the recipe. Shape them as best you can into flattish balls and lay them to rest on a tea towel covered with cornmeal/polenta or rice flour, cover loosely with another towel and go back to bed.

Sunday 9:00am The muffins are ready to bake; heat a heavy bottomed pan over a medium heat and add three or four muffins – don’t overcrowd the pan. Turn them 180 degrees after three mins, after five minutes flip them over and keep cooking for five more minutes, rotating halfway.

Repeat with the remaining muffins.

image

image

Fermented Chili Sauce

I’ve been reading Sandor Katz’s Art of Fermentation on and off for about six months; it’s an absolute treasure trove of information covering more types of fermentation than I even knew existed. It’s also pretty boring so takes time and concentration to read.

I’ve done a few experiments from it, some successful some not so much. This hot and sour fermented chili sauce is version three of a rough formula outlined in the book (the methods in the book are less recipe and more meandering discussions of possible variations of endless possibilities).

You can vary which chilies you use depending how hot you want it, I currently have a plain red chili sauce which is no hotter than Tabasco, and one spiked with scotch bonnets and habaneros which is quite fiery. No two ferments are the same so it’s always exciting to see how the finished sauce will be.

I’ve made this recipe in percentages, meaning the total weight of your chillies = 100%, everything else is a percentage of the chili weight.

Chillies

Chillies 100%
Garlic 5%
Ginger 2.5%
Toasted, ground and sieved Sichuan pepper 0.5%
Sea salt 2%

Remove the stems from the chillies and finely slice them and add to a metal bowl. Mince the garlic and ginger and add to the chillies.

Sprinkle over the salt and Sichuan pepper, then start mashing it all together; I use the flat end of a rolling pin, you need to mash it for about ten minutes to break down the cell walls of the chili and let the juices out and the salt in.

After ten minutes you will end up with a kind of wet, chili paste, your eyes will stream and your skin will burn.

image

Transfer the mixture to a suitably large preserving jar. This mashed chili mixture has enough salt to keep bad microbes away but not too much to kill the natural yeasts and good bacteria that live in the chillies. At warm temperatures this will start fermenting in a few hours, in winter it could take a day or so.

image

Once the chili sauce starts fermenting, lactic and acetic acid is produced, this adds a delicious sharpness to the finished sauce, but also makes the sauce hostile to bad bacteria such as those that cause botulism. The sauce is essentially pickled.

Actively fermenting sauce

This can ferment for anywhere between two and four weeks, it’s difficult to taste in this state so you need to decide how sour you want the sauce to be, closer to four weeks it will be more sour than at two weeks. Eventually the yeasts and bacteria will run out of food, or the sauce becomes too acidic, and fermentation will stop.

The following picture was taken at 3 weeks, fermentation had almost finished, probably because it was 30+ degrees for most of the three weeks (warm things ferment faster)

image

When ready, blitz the chili sauce in a food processor and pass through a sieve. You’ll end up with a sauce with the consistency of Tabasco, but infinitely more flavor. Bottle and store in the fridge; the flavor will continue to change(improve?) for many months as it continues to slowly ferment. Keeps for at least three months, probably years.

image